Wednesday, January 19, 2011

Gravel, gravel, everywhere....

Pile of gravel awaiting distribution. See that ground to the right/rear of the pile? See how green it is? Yeah, that's driveway. It should not be green.

We have a gravel driveway. At first I was a bit dismayed at this fact because as cyclists, my husband and I would much prefer to ride on pavement. Of course, our driveway is short, so we figured we could live with it and it certainly wasn't a deal breaker when we bought the house.


After almost three years of dealing with it, we had an estimate done to have it paved. Holy moley...that is NOT what we want to spend our money on! Besides the fact that gravel is better for the environment (it doesn't disrupt water flow patterns), it's cheaper. And frankly, in our little country farm world, I think the gravel looks better with our house than a pristine asphalt slab would. Unfortunately, all this indecisiveness has only led to a driveway that gets greener and greener each year (and not in a good way!).


Then we finally have our mini barn built. It has a gravel foundation under the main enclosed part. We are about to pour a concrete slab on the open part where the goats will live (concrete lasts longer than wood and it's cleanable for birthings as necessary). To pour this concrete, we need to add some gravel to level the area out a bit. Last weekend, we had a truckload of gravel delivered from a local shop up the road. $180. Significantly less costly than asphalt and it will do double duty as concrete foundation as well. Score!


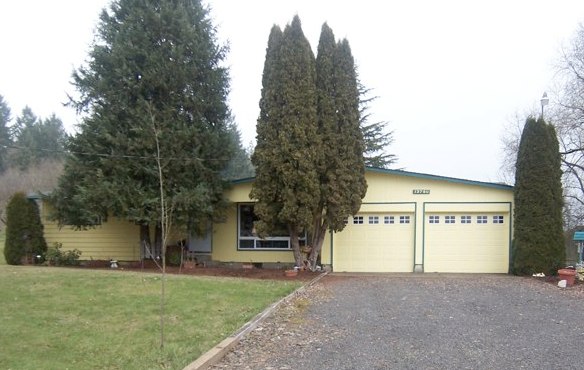
Our wonderful small tractor, the handy cart and our new mini barn...


But now we get to distribute it. Yay, not. First we loaded up our handy-dandy new trailer to drag the gravel from the driveway to the back corner of our property where the barn is located. A couple of trailers full, and the space is sufficiently leveled. (This trailer will be 100% necessary to move 36 80lb bags of concrete to the site as well.)


The remaining gravel will need to be spread out on our existing driveway. This will not be fun. This will be back-breaking work. It is a necessity. Not only are the weeds taking over in the summer, but we are finding that the mud is getting a bit too thick in the winter. Gravel, gravel, everywhere... anyone looking for a unique way of getting some exercise this weekend? ;-)

Tuesday, January 18, 2011

Winter harvest - carrots!

Many pounds of carrots (and parsnips) awaiting their fate...


We planted 4 types of carrots and one type of parsnip (and beets) all in the same 12 inch high box in our garden last year. They grew like crazy! We've been harvesting them as we've needed them for stews or recipes since August, but we've never bothered to dig up the whole box.

A couple of weeks ago, I went to pull out a few and I found that I had to really hack at the ground because the top two inches or so were frozen. I decided then that the next time we had a string of warmer days in a row, I'd harvest the remainder of the carrots. We had that string of days last week - 4 or so of 50+ weather in a row...plenty to soften the box soil.

So on Sunday, I grabbed my old milk crate and set out to harvest the remainder. Uh, yeah. That was a bit ambitious. I had no idea how many carrots we had!! The crate above is only two varieties of carrots and the parsnips. I still have two more varieties of carrots and one of the ones I didn't dig up actually occupies a double space. The above crate was easily 20 lbs in weight and I have no doubt that there is the same amount or more still to be harvested. That's greater than 40 lbs of carrots in a 2' x 4' box! Talk about space utilization!

My plan was to can...but I just couldn't bring myself to pull out the pressure canner and all that goes with it. I'll save that for the next harvest (next weekend?). For the carrots above, I cooked a few pounds to have with meals, I mashed some of them and made a yummy carrot-orange snack cake. I peeled a bunch and put them in the fridge for snacking. I'm going to make some carrot muffins or cake later this week. And lastly, there will be roasting. Lots of roasting. Nothing is yummier than roasted root veggies with garlic and rosemary (both also from our garden). The yellow carrots in the above bin are ok raw, but they are buttery and sweet when cooked - even without butter or sweetener! YUM! Lastly, I've wrapped them up and I'm storing them on the deck railing for now. We have no room in the fridge!

Anyone have any carrot recipes they want to share?

Thursday, January 6, 2011

A New Entryway

This is what our house looked like when the old owners first listed it - about a year before we saw it for the first time...


Our front entry into our house was pretty pathetic. It was narrow, partially blocked by the flower bed, ugly and worst of all, slanted towards the house so that when it rained (which happens here a lot), water would eventually run towards the house. If the water sat there long enough, it would soak into the basement walls. Not good.

This slant appeared to be getting worse each year so this year, we decided that it needed fixing. First of all, we had the huge old stump that sat in the flower bed dug out. Before we bought the house, there was a huge pine tree there (see above) but the previous owners removed it. We know it was pretty recent since the original listing showed the tree but it wasn't there when we viewed the house. We thought that the stump/roots were still expanding and therefore lifting the sidewalk. Once the stump grinder people dug it out, we found out that it wasn't the case. Most of it was already rotting. Ok, so the sidewalk might not have been getting worse...it just appeared that way. I didn't need that huge stump in the way of what will eventually be an herb garden anyway.
The next step was getting the walkway repaired and resloped. We briefly thought about doing it ourselves but quickly changed our minds when considering how this basically attaches to our foundation. So we got a few estimates and selected a local crew to do the work for us. They were going to pull out all the old cement, relevel it, widen the opening so that it curved towards the driveway more and create a new low wall to better contain the flower bed. They were starting work when I left for work one day and by the time I got home, it was done! Awesome!!
Here are the photos. I don't have great before photos, so these will have to do.


This is the front entryway before we had our siding replaced. Where the chairs are is where the water would collect against the house. You an also see how the dirt from the flower bed would just fall into the walkway.


This was taken as the siding work was underway. Here you can see the whole walkway and how narrow it is at the end by the garage (front door is to the left). The stump is where those flowers are in front of the ladder.


Here is what it looks like today! No stump. Nice wall. Open walkway. And no water collects against the house. Yay!

The next step is to extend the wall around the entire bed and get some herbs planted this spring/summer. Our plan is to finish the wall this winter so that we can plant as soon as it warms up.

Tuesday, January 4, 2011

2011 Begins

Happy New Year!


New years resolution #1: Blog more.


There, that takes care of this week. ;) Actually, my minimum goal will be at least one blog post a week..and more if I can swing it. Stay tuned!!


In the meantime, here are a couple of photos of our repainted laundry/storage room and our dining room.

The laundry room with a peep at our kitchen through the doorway. In the mirror, you can see the previous color on the partially unfinished wall (yellow).


Slightly closer shot of the shelving. I have green and yellow awning stripe fabric for curtains. Let's see how long it takes for those to get done!


And lastly - our dinning room. The trees in the background are only in residence during the winter - they usually hang out in the greenhouse (dwarf orange and meyer lemon).